Creating a Jumbo Granny Square Patchwork Quilt - Planning with Canva and Sewing instructions
- Feb 10, 2024
- 4 min read
Updated: Jul 6, 2025

What is a jumbo quilt?
A jumbo (XL, large) quilt block quilt typically refers to a quilt that features larger-than-average quilt blocks. In quilting, a "block" is a unit of the quilt top that is created by sewing together various pieces of fabric. These blocks are then combined to form the overall quilt design. Jumbo quilt blocks are simply larger versions of these traditional quilt blocks.
Quilt blocks come in various sizes, but jumbo blocks are notable for being significantly larger than standard blocks. The specific dimensions of jumbo blocks can vary, but they are often chosen to create a bold and eye-catching effect in the quilt. Using larger blocks can make the quilt top come together more quickly, as fewer blocks are needed to cover the same surface area.
Quilters might choose jumbo quilt blocks for a variety of reasons, including to showcase large-scale prints on the fabric, to create a unique and modern design, or to make the quilting process faster and more beginner-friendly. The choice of quilt block size is a creative decision that adds a distinctive touch to the finished quilt.

The quilt block used for this quilt is a Granny Square
A Granny Square is a traditional crochet motif, but in sewing, it is a quilt block that mimics the look of a Granny Square crochet pattern. This is achieved with smaller squares or rounds arranged in a grid-like pattern. Each smaller square or round is often a different colour, creating a visually appealing and nostalgic design.
Planning square quilts using Canva
Canva can be a valuable tool for sewists who want to visualise a quilt design before actually sewing it. Quilters can experiment with different colour combinations and design elements digitally, allowing them to assess the overall appearance of the quilt before making any cuts in the fabric. This approach helps to make informed decisions about colour coordination and design layout, providing a convenient and risk-free way to explore creative possibilities without the commitment of physically cutting and piecing fabrics together.
You are able to upload images of the fabrics that you are considering to use for a quilt and plan the layout of each square accordingly, giving an preview of the final quilt. This is very helpful if the quilt design uses simple shapes such as squares and triangles. More complex designs may be a little trickier to design using this website, but a general idea for colour is still achievable.
Here's some more examples of sewing projects I have brainstormed using Canva -


Planning and making my quilt
Here is my initial idea for the quilt below on the left. This isn't a jumbo quilt block pattern, it's 9 smaller granny square quilt blocks in rows. I loved the look of this quilt but decided that the squares would be too small for the fabric I wanted to use as this fabric doesn't use a small print. Instead, I took one of the granny square block and made it larger (on the right.) From here, I worked out how big I wanted the final quilt to end up and decided to used 6.5" squares for my quilt. After playing around with the colours, I settled on this design.


From here I was able to work out how many squares of each fabric I would need to cut -

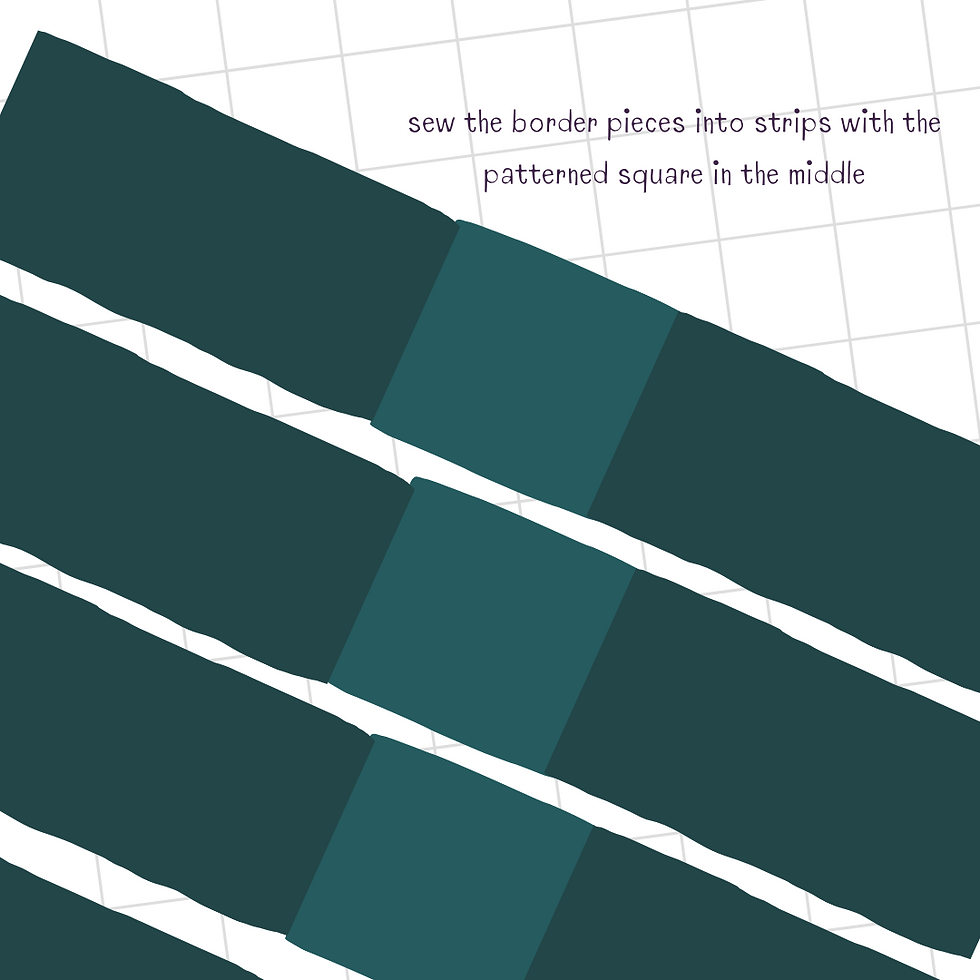
For the border, I like to cut the strips slightly longer than I need and then trim them down once they are sewn to the quilt. This means you don't have to be totally accurate when sewing and makes it a little easier.
Here's all of the individual pieces of fabric that I laid before sewing -

Piecing the quilt together


Use the quilt top to cut wadding and backing fabric to a few inches bigger.


After the lines are quilted, trim back the wadding and backing to the same size as the top.
Finishing touch: binding and applique

The applique moon and stars ties in with the printed fabric I was using for the quilt. The theme is a cosy, enchanted cottage in the woods, so adding these extra elements complimented the overall look of my quilt. I cut the shapes from cotton fabric that I had also used in the quilt and used a blanket stitch on my sewing machine to sew them in place.

Sticking with a cosy theme, I chose a velvet bias binding to finish the edges of the quilt. I used a forest green colour to blend in with the teal border. This was sewn on last.
The backing material features a simple William Morris print designed specifically for backings due to its extra-wide width. For a quilt of this size, the preference is for fabric wider than the standard 112cm cotton.

links for fabric and tools


Love this thank you Kim.