Easy Lavender Bags Sewing Tutorial | Handmade Gift Idea with French Seams
- Sep 12, 2025
- 5 min read
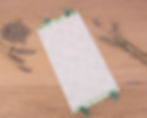
DIY Lavender Bags
There’s something so special about lavender, isn’t there? Every summer I find myself drawn to those little purple blooms in the garden - they’re beautiful to look at, but the scent is what really gets me. This year I finally had a go at harvesting and drying my own lavender. It felt very wholesome cutting the stems, hanging them upside down in bunches, and waiting for the flowers to dry. And now comes the fun part: actually using them!

As summer comes to an end and cosy season begins, these little lavender bags are the perfect touch of comfort - something soft and handmade to carry that summer scent into autumn.
If, like me, you’re new to working with dried flowers, making a lavender pouch is the loveliest place to start. It’s beginner-friendly, uses just one rectangle of fabric, and the sewing is super straightforward. We’re also going to use French seams, which sound fancy, but really just mean the inside of your pouch looks as neat as the outside - no fraying edges in sight.
They are tied with twine or ribbon around the outside rather than threaded through a drawstring, which makes this an even more beginner-friendly project if you are just starting out, or want a simple, yet useful make.
These pouches (or bags) are ideal for slipping into your drawers, tucking under your pillow, or giving as thoughtful handmade gifts. Plus, the scent of lavender is said to be calming and soothing - perfect for winding down at the end of the day.
How to Harvest & Dry Lavender 🌿
If you’ve never dried lavender before, here’s a quick guide to get you started:
When to harvest: Mid- to late summer is best, when most of the flowers on each stem have opened but before they start to fade.
For fragrance: Snip stems just as the buds are opening - that’s when the scent is at its strongest.
For colour: If you want the flowers to stay bright purple, harvest a little earlier, while the buds are still tight. I've left mine as late as possible though because the bees love the flowers!
Time of day: Cut in the morning, once the dew has dried but before the midday sun, to lock in the oils.
Gather small bunches, tie them with string, and hang them upside down in a dry, airy spot out of direct sunlight. They usually take 1–2 weeks to dry completely, and you’ll know they’re ready when the buds feel crisp to the touch.

Don't Have a Lavender Plant? 🌿
Don’t worry if you don’t have lavender growing at home, you can still enjoy making these pouches! Dried lavender is easy to find online or at craft and herbal shops. Look out for organic lavender if you can, as it’s grown without chemicals and will have a lovely, natural scent. You can also find it sold in bulk, which is perfect if you’d like to make a batch of pouches for gifts.
Filling Options 🌸
You can fill your pouch with just lavender, but I also like to mix in a little rice. The rice gives the pouch a nice weight and helps spread the scent around. A good ratio is 1 part rice to 2 parts lavender, but feel free to adjust depending on how much lavender you have on hand. Simply stir the two together in a small bowl before spooning them into your pouch.
These pouches are also refillable - if you find the scent fades over time, just top them up with fresh lavender or add a few drops of lavender essential oil to revive them and give them extra longevity.

And don’t feel you have to stick to lavender! You can swap in other dried herbs and flowers depending on the season - think rosemary for a fresh, piney scent, mint for something uplifting, or chamomile for a calming, cosy vibe.
What You’ll Need:
A rectangle of lightweight cotton fabric (approx. 6” x 12” is a good starting size, but you can adjust depending on your scraps)
About 12” of ribbon, cord, or twine
A handful of dried lavender
a handful of rice
Sewing machine (or you can hand sew if you like)
Pins or clips, scissors, iron
For lavender bags, it’s best to use a breathable fabric like cotton, linen, or lightweight muslin. Avoid anything too heavy or coated, as the scent won’t seep through as easily. Lighter fabrics let the fragrance of the lavender slowly release over time.
Finished size:
approx. 5" x 4.25"
If you'd like your pouches to be larger or smaller, add or take an inch or two to the cutting measurement.
Step 1: Fold and Press the Casing
Lay your fabric rectangle flat with the short edges at the top and bottom. On both short edges, fold the fabric over by ¼” and press. Fold it over again by ¼” and press to make a neat double hem. Sew in place.

Step 2: Sew the First Seam (Wrong Sides Together!)
Now fold your rectangle in half, bringing the short edges together so the hemmed edges meet at the top. Place the fabric with wrong sides together - this is the opposite of what you’d normally do! Pin or clip down both the sides.
Sew along the sides using a ¼” seam allowance.

Step 3: Enclose the Raw Edges
Turn the pouch inside out so it’s now right sides together. Give it a press, then sew again along the same sides with a slightly deeper seam allowance. This encloses the raw edges inside the seam - voilà, you’ve made a French seam!

Step 4: Turning Out
Turn the pouch the right side out and give it a good press. If you notice that any raw edges are still visible, don’t worry - this is easy to fix! Simply turn it back and sew along the sides again, this time using a slightly larger seam allowance to fully enclose the edges. Press the pouch flat, and it should now look neat and tidy inside and out.
Step 5: Filling the Pouch
In a small jug or bowl, mix together your dried lavender and rice. A good ratio is 1 part rice to 2 parts lavender, but you can adjust depending on how much lavender you have. Using a jug makes it easy to pour the mix neatly into your pouch without spilling.

Spoon or pour the mixture into your pouch, but don’t overfill. You’ll want to leave enough space at the top so it can be gathered and tied securely.

Step 6: Tie and Finish
Simply gather the top of the pouch together and tie your ribbon or string tightly around it. Knot it firmly and finish with a bow if you like.
This tie technique makes the pouches easy to untie and refill whenever the scent fades. But if you’d prefer a longer-lasting option, you can also turn this into a little lavender pillow by sewing the top edge closed instead of tying it.

Done!
And that’s it, your very own lavender pouch! These are such a joy to make, and they’re a wonderful way to use those first bunches of dried lavender from the garden. I've already made a few extras to tuck into drawers, pop into project bags, and wrap up as little handmade gifts.

If you give this project a go, I’d love to see your pouches - tag me over on Instagram so I can admire your makes.
Happy sewing! ✂️💜