Heart Petal Placemats - sewing tutorial perfect for scrap fabrics
- Kimberley Hind
- Jun 13, 2025
- 3 min read
Updated: Sep 8, 2025

Placemats Sewing Tutorial -
Add a handmade touch to your table with these sweet heart-shaped placemats! They’re beginner-friendly, quick to sew, and a lovely way to use up your favourite fabric scraps. Perfect for garden picnics, a tea party, or just to make everyday mealtimes feel extra special.
For this placemats sewing tutorial, I've used the 60-Degree Heart Acrylic Templates by Debbie Shore Sewing for this project, which makes cutting your pieces super easy and accurate. But you can absolutely draw your own heart if you prefer.
Each heart shape measures approximately 6 ¼" tall by 5 ¼" wide, with a 60 degree point. So you can sketch a heart with those dimensions on paper or card and use it as your guide. The layout is made from six petal-shaped wedges joined together to form the patchwork heart.
Finished size: approx. 12" round.
What You’ll Need (for one placemat):
6 fabric pieces for the petals – approx. 6" x 7" each
2 pieces of backing fabric – approx. 14" x 7"
Wadding – approx. 14" x 14" (I used an 80/20 wadding used in quilts, but a Vlieseline H630/640 would also work!)
Thread to match or contrast
Fabric pen
Seam ripper
60-Degree Heart Acrylic Templates by Debbie Shore Sewing
Before you start:
Choose your fabrics:
Mix and match prints or go for a coordinated look. You’ll need six petal shapes for each placemat. I love using different fabrics from the same colour family for a cosy, patchwork effect.
Try fussy-cutting prints for extra impact on each petal.
A 1/4" seam allowance is used throughout.
Video tutorial available-
Let's sew!
Cut 6 heart shapes using your 60 degree heart template.


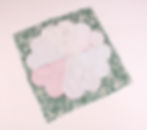
Arrange the hearts in a circle. Sew together along the sides, three at a time, pressing the seams as you go.

Sew the two halves together and press.

Place the hearts over your wadding and cut to the same size. Pin in place or adhere the wadding to the back if it is fusible.
Quilt at this point if you wish, or save this step till the end. I've sewn 1/4" down each side of the hearts. (Quilting now can help keep the wadding in place if it isn't fusible.)

Sew the two backing pieces of fabric right sides together along the longer edge using 1/2" seam allowance.

Place this backing fabric right sides together to the front hearts, and sew around the entire edge of the heart petals.
Tips - take it slowly, use 1/4" seam allowance, shorten your stitch length, use the edge of your presser foot as a guide.

Cut the backing to the same size as the front hearts with the 1/4" seam allowance. Snip into the points of each heart shape to make turning out neater.

Use a seam ripper to make an opening in the centre of the backing seam, approx. 3" long.

Turn the placemat right side out through this opening. Make sure to push out each petal shape. If the seams are bulky or puckered, turn back through and trim down the seam allowance.
Press, and then sew the turning gap closed by hand using a ladder stitch.
Top stitch around the edge of the placemat to finish.

If you hadn't quilted the placemat before, do so now if you wish.
That's the placemats finished! Repeat with similar fabrics for a fun, mismatched set or keep it uniform with mats that are all the same design. Why not make a centre piece using larger heart shapes? Or use these as applique for a matching table runner or to decorate s tablecloth!
I’d love to see your versions! Tag me on Instagram & Facebook @whatkimberleymakes or use the hashtag #WhatKimberleyMakes so I can admire your makes. 💕
Happy sewing! Kym x

