Fabric Christmas Aperture Cards Tutorial - V&A Scottie Dog
- Nov 20, 2021
- 3 min read

Don’t waste any of your scrap fabric this Christmas! These quick and easy cards use small pieces of fabric and wadding to create unique cards for special ones. Add ribbon, decals, or calligraphy on the front of the cards to personalise, or leave blank for a minimalist look. You can make these cards in any sizes; I’ve listed below what sizes I’ve used.
This fabric is a celebration of the classic cards archive from the V&A museum, featuring playful Scottie dogs and Christmas baubles.

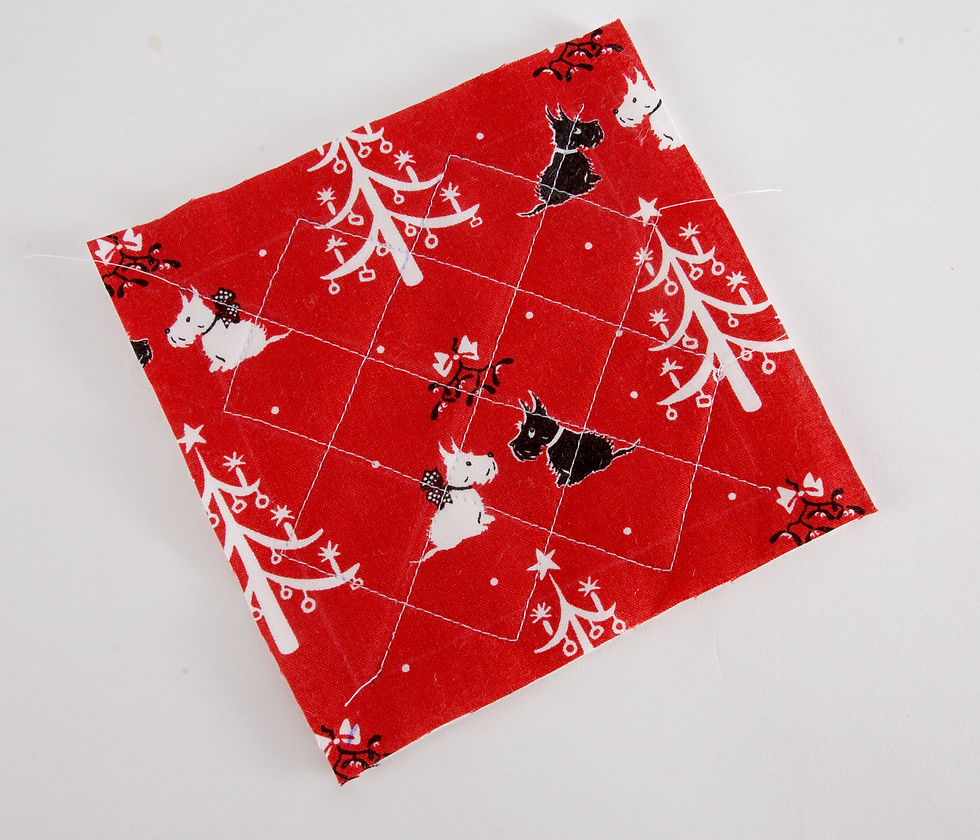
QUILTED LINES CARD

What you’ll need:
o Strips of fabric 4cm wide
o Wadding (80/20) measuring no bigger than the card
o Strong double-sided tape
o Spray glue (I’ve used odif 505)
o Erasable marker
o 5.5” square aperture card
1. Sew together strips of 4cm wide fabric until it is slightly larger than the aperture.

2. Cut a piece of wadding slightly larger than the fabric, place the fabric over the wadding and quilt by stitching along the seams.

3. Place the fabric behind the aperture at an angle to create the diagonal lines. Draw the shape of the aperture onto the fabric.

4. Cut the fabric slightly larger than the aperture marks. Adhere to the inside of the card with double-sided tape.

QUILTED PRESENT CARD

What you’ll need:
o Fabric and wadding (80/20) measuring slightly bigger than aperture shape
o A ruler and erasable marker for quilting
o Ribbon
o Wet glue (I’ve used Gutermann HT2)
o Spray glue (I’ve used Odif 505)
o Strong double-sided tape
o 5.5” square aperture card
1. Cut the fabric of choice slightly bigger than the aperture.
2. Cut a piece of wadding to the same size.

3. Use a spray glue (505) to adhere the wadding to the back of the fabric. Place behind the aperture and draw around the shape.
4. Draw diagonal 1” lines across the square using an erasable marker and ruler. Sew over these lines to quilt.
5. Cut 2 pieces of ribbon slightly bigger than the quilted square. Use a wet glue (HT2) to adhere the ribbon to the square. Glue one piece lengthways and the other widthways to create a wrapped present look.
Cut a third piece of ribbon. Tie a bow with the ribbon and glue to the crossover point of the ribbon on the square. Trim the tales if needed. Hand sew in place for extra security!

6. Use double sided tape to stick the quilted square to the inside of the card.
BAUBLE CARD

What you’ll need:
o A piece of fabric for the background of the card measuring slightly bigger than the shape of the aperture. I’ve used a light grey cotton.
o Bauble print fabric
o Iron-on adhesive on transfer paper – I’ve used ‘Bondaweb’
o Ribbon
o Strong double-sided tape
o Erasable marker
o Marker pen for sentiment (optional)
o A5 oval aperture card.
1. Cut a small piece of fabric that features the baubles you’d like to use for the card. Adhere your fabric to the Bondaweb following the instructions on the packet.
2. Cut out the bauble shapes. These are now your applique pieces.

3. Draw the shape of aperture onto the background fabric.
4. Cut 3 strips of ribbon at different lengths.
5. Iron the baubles in place inside of the aperture shape with ribbon tucked slightly behind to look as though they are hanging.

6. Free motion stitch around the baubles and along the ribbon.
To free motion sew, you’ll need a free motion/darning foot for your sewing machine. Alternatively, you could use a straight or satin stitch.

7. Use double sided tape to stick the bauble panel inside the card. Add any sentiments you wish.
TIP – if you’d like to use calligraphy, download templates online to practise!
I hope that you have fun making your own fabric Christmas cards this year, Merry Christmas!
Kym x
Fabric commisioned for project


Comments