How to Make Patchwork Quilted Double Oven Glove - Sewing Tutorial
- Sep 18, 2021
- 2 min read
Use a 5 piece fat quarter pack you can make this handy double oven glove, a necessity for every kitchen!

What you’ll need:
A fat quarter pack of 5 fabrics (I've used 'countryside mustard' fabric from Dunelm)
30” x 8” plain cotton (this won’t be seen)
30” x 8” thermal wadding (I've used Bosal Thermal Fleece)
96” of 1” wide bias binding
Basting spray (505)
8” circle template (I've used a plate)
Erasable fabric pen
Finished size:
30” x 8”
Use ¼” seam allowance
How to make:
1. Cut about 20 strips of fabric measuring 3” x 10” from 4 of the fabrics. Sew the first strip wrong side down to the left side. Place the second strip right side down over the first, at an angle, and sew along the right edge.
TIP – Make sure your second strip of fabric doesn’t go over onto the plain fabric, otherwise the effect wont work.

2. Flip over the fabric strip and press.

3. Place the next strip right side down over the top of the second and sew as before. Flip over and press. Continue sewing the strips in this way until the plain fabric is completely covered.
TIP – if you want the wonky effect of the fabric strips, sew them at different angles each time.

4. Place your circle template over each short end of the fabric and mark with an erasable pen.

5. Trim around the arcs drawn.

6. For the back of the gloves, cut a 15” x 8” piece of fabric and two contrasting pieces each measuring 8” x 8”. Sew the contrasting pieces right sides together to each end of the 15” piece. Adhere thermal wadding to the back with basting spray. Use your circle template to round the ends as before.

7. Place this piece over the wrong side of the patchwork top fabric, adhere with basting spray.

8. To quilt, sew ¼” each side of the patchwork seams through all layers.

9. Cut four squares of fabric each measuring 8” x 8” from the remaining fabric. Use your circle template to round one side of each piece.
Adhere wadding to the wrong sides of two pieces.

10. Adhere these to the wrong sides of the remaining pieces, with the wadding sandwiched in the centre. Quilt in straight lines at angles to mimic the quilting on the patchwork strip.

11. Sew bias binding to each straight edge.

12. For the hook, cut a 3” length of bias binding, fold in half lengthways and sew. Fold in half and sew, facing inwards to the centre of one side of the gloves.

13. Place the two pockets over each end of the patchwork strip and sew in place.

14. Sew bias binding all around the gloves, overlapping the ends to make neat.

15. Wrap the binding around the edge of the gloves, hand-sew with a slip stitch. (You may have to trim back some of the fabric as the wadding is quite thick.)
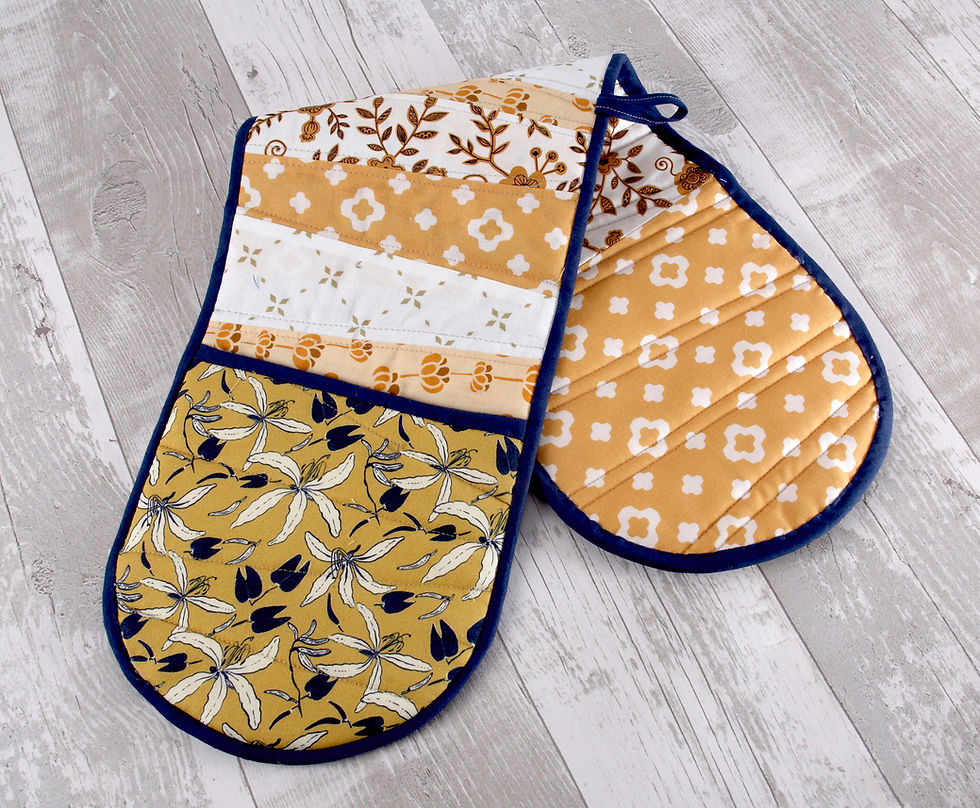
Now your gloves are ready to use! These would make a great gift or make a matching apron to compete the look.
Happy sewing!
Kym x


Comments