How to Turn 16 Half Square Triangles into a Ruffle Edge Cushion Cover - free sewing tutorial
- 4 hours ago
- 5 min read


Ruffle Edge Cushion Cover Sewing Tutorial
This ruffle edge cushion cover is a lovely follow-on project if you’ve already tried my 16 at a time half square triangle tutorial and have a little stack of HSTs ready to use.
It’s a simple way to turn 16 half square triangles from one tutorial block into something finished, useful and very cute.
It is also perfect for using up sample blocks, leftover fabrics or those quilt blocks that have been sitting in a drawer waiting for their moment. Instead of letting them disappear into a pile of unfinished makes, you can turn them into a pretty ruffle edge cushion cover that feels both practical and special.
For this cushion I used 16 half square triangles, each trimmed to 4" unfinished, and arranged them into a simple star block. Once sewn together, the cushion front measures approximately 14½" square before sewing the cushion together. The finished cushion cover will be around 14" square.
A 14" cushion pad works well for a nice plump finish.
Finished size
Approx. 14" square, not including the ruffle.
You will need
16 half square triangles, each trimmed to 4" unfinished
Fabric for the cushion back
Fabric for the ruffle
Wadding and backing fabric for quilting the cushion front, optional
14" cushion pad
Basic sewing kit
Rotary cutter, ruler and cutting mat
Pins or clips
Cutting instructions
For the cushion front:
16 half square triangles, each 4" square unfinished
For the envelope back:
Cut 2 rectangles measuring 14½" x 10½"
For the ruffle:
Cut enough 5½" wide strips to measure approximately 2½ times the circumference of your cushion front.
For a cushion front measuring around 14" square, this will be approximately 140" in total length.
Optional for quilting:
1 piece of wadding, approx. 16" square
Step 1: Make your half square triangles
This project is designed as an extension of my 16 at a time half square triangle method.
Once you have made your HSTs, trim each one to 4" square. Taking the time to trim them all to the same size will make the star block much easier to sew together neatly.
If you are new to this method, you can follow my 16 at a time HST tutorial first, then come back to this project once your blocks are ready.
Step 2: Arrange the star block
Lay out your 16 half square triangles in a 4 x 4 grid.
Play around with the direction of the triangles until you have a star shape you are happy with. I like to place the darker triangles so they create the points of the star, but this is a lovely part of the process to experiment with.
Once you are happy with the layout, take a quick photo on your phone so you can refer back to it as you sew.

Step 3: Sew the block together
Sew the half square triangles together in rows using a ¼" seam allowance.
Press the seams in opposite directions on each row so the seams nest nicely together.
Then sew the rows together to complete the cushion front.
Your finished cushion front should measure approximately 14½" square at this stage.
If it is slightly smaller, do not worry. As long as it is square, the cushion will still work beautifully.

Step 4: Quilt the cushion front, optional
If you would like your cushion front to have a more padded, quilted finish, place it on top of a piece of wadding and backing fabric.
Quilt as desired.
You could quilt either side of the seams, stitch simple diagonal lines, or just add a few lines to keep it soft and simple.
Once quilted, trim the cushion front back to 14½" square, or to the size of your finished block.
Step 5: Make the ruffle
Join the strips together at the short ends to make one long strip. Then sew the two short ends together to create a loop.

Fold the ruffle loop in half lengthways with wrong sides together and press.
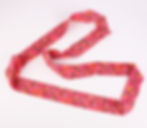
Sew two rows of gathering stitches around the raw edge of the ruffle. Use a long stitch length and do not backstitch at the beginning or end.
Gently pull the threads to gather the ruffle until it fits around the outside edge of your cushion front.
Take your time to spread the gathers evenly before sewing it in place.

Step 6: Attach the ruffle to the cushion front
Place the ruffle around the edge of the cushion front, with the raw edges together.
The folded edge of the ruffle should be facing towards the centre of the cushion.
Pin or clip the ruffle in place, easing the gathers evenly around all four sides.
When you get to the corners, take your time and arrange the gathers so they sit nicely.

Sew the ruffle to the cushion front using a ¼" seam allowance.
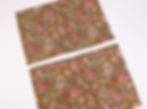
Step 7: Prepare the envelope back
Take the two back pieces measuring 14½" x 10½".
On one long edge of each piece, fold the fabric over to the wrong side by 1/4"" and press.
Fold over by another 1/4" and press again.

Topstitch close to the folded edge to create a neat hem.
These two pieces will overlap to create the envelope opening.
Step 8: Sew the cushion together
Place the cushion front right side up.
Place one backing piece on top, right side down, lining up the raw edges. The hemmed edge should be towards the middle.
Place the second backing piece on top in the same way, so the hemmed edges overlap in the centre.
Pin or clip all the way around.
Sew around the cushion cover using a ¼" seam allowance. You may want to sew around twice for extra strength, especially over the envelope overlap.

Trim the corners slightly, being careful not to cut through the stitching.
Turn the cushion cover right side out through the envelope opening.
Gently poke out the corners and press.
Step 9: Add the cushion pad
Pop in your cushion pad and give everything a little fluff.
Your 16 HST star block has now become a finished ruffle edge cushion!


Tips
If your finished block is smaller than 14½", cut your envelope back pieces to match the width of your cushion front. For the height, use around 10" to 10½" for each back piece so you still get a good overlap.
If your ruffle feels too full, remove a little length before joining the ends.
If you want a softer ruffle, choose cotton lawn, lightweight cotton or a softer quilting cotton.
This is a brilliant project for spare blocks, test blocks and tutorial samples. Not every quilt block needs to become a whole quilt. Sometimes one block is enough to make something lovely!
Happy sewing, Kym x