Pattern-Free Tote Bag - How to Sew a Simple Lined Tote Bag for Beginners

How to Sew a Simple Lined Tote Bag
This simple lined tote bag is a lovely beginner sewing project and a great way to use up leftover fabrics from dressmaking, quilting or other sewing projects. I made mine as a little extra project to go alongside The Pattern-Free Wardrobe, but you can use any medium weight cotton, linen or leftover fabric you have in your stash.
The bag is fully lined and has a simple inside patch pocket, which is perfect for keeping smaller bits neatly tucked away. It is a handy size for everyday use, shopping, carrying your essentials or folding up and keeping inside another bag.
Fabric used: Floral Linen Embroidered Fabric (aff. link)
What you’ll need:
Two outer fabric pieces measuring 13.5" x 15.5"
Two lining fabric pieces measuring 13.5" x 15.5"
Two handle strips measuring 4" x 24.5"
One pocket fabric piece measuring 8" x 12"
Finished size: approximately 13" x 15"
Use a 1/4" seam allowance throughout.
Instructions:
Fold the pocket fabric in half, right sides together, so it measures 8" x 6". Press.
Sew around the three raw edges, leaving a turning gap of about 2" along the bottom edge.

Turn the pocket right side out through the gap and press well.

Top stitch along the folded edge of the pocket. This will be the top of the pocket.
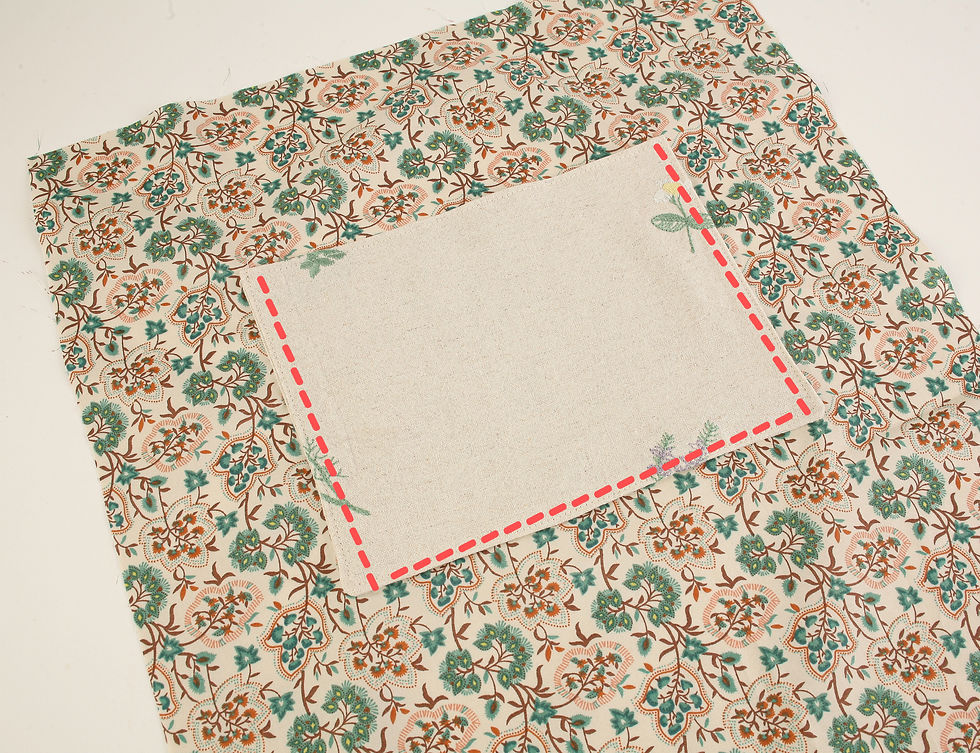
Place the pocket over one lining piece of fabric centrally, 4” from the top edge and pin in place.
Sew around the two sides and bottom of the pocket, close to the edge. Leave the top edge open. Sew back and forth at the top corners to make the pocket extra secure. The turning gap will be closed as you sew the pocket in place.
To make the straps, fold one handle strip in half lengthways, wrong sides together, and press. Open it back out, then fold both long raw edges in to meet the centre crease. Press again.

Fold the strip in half once more so the raw edges are enclosed. Press, then top stitch down both long sides. Repeat to make the second strap.

To create the boxed base, cut a 1.5" square from both bottom corners of each outer and lining piece.

Place one strap onto the top edge of one outer bag piece. Position each raw end 2" in from the side edges, with the loop of the strap facing down towards the bag. Make sure the strap is not twisted. Pin and tack in place within the seam allowance. Repeat with the second strap on the other outer bag piece.

Place the two outer bag pieces right sides together. Sew down both side edges and along the bottom edge, but do not sew across the cut out corners.

To box the base, open out one cut out corner and bring the side seam and bottom seam together. Line up the raw edges, pin, then sew across the corner.

Repeat with the other corner of the outer bag.

Place the two lining pieces right sides together. Sew down both side edges and along the bottom edge, leaving a turning gap of about 3" in the bottom seam. Do not sew across the cut out corners.
Box the two lining corners in the same way as the outer bag, matching the side seam to the bottom seam and sewing across each corner.
Turn the lining right side out. Keep the outer bag wrong side out.

Place the lining inside the outer bag so the right sides are together. Match the side seams and pin around the top edge. The straps should be sandwiched between the outer bag and the lining.

Sew all the way around the top edge of the bag.
Turn the bag right side out through the turning gap in the lining.
Sew the turning gap closed by machine or by hand.
Push the lining inside the outer bag and press the top edge neatly.
Top stitch around the top edge of the bag to finish.

This tote bag is a lovely little project to make with leftover fabric, especially if you’ve been sewing garments and have those awkward pieces that are too good to throw away but not quite big enough for another make.
It also ties in nicely with my book, The Pattern-Free Wardrobe, which is all about making simple, wearable projects without needing paper patterns. The book includes 10 easy dressmaking projects, along with a few extra ideas for using up your fabric scraps too.
So once you’ve made something to wear, you can use the leftovers to make something useful as well. A little matching tote bag, a project bag, or just a handy everyday bag that didn’t need much fabric at all.
Happy sewing! Kym x
find me on Instagram at @whatkimberleymakes, where I share more simple sewing projects, tutorials and behind the scenes makes.
I’d love to see what you make, so feel free to tag me in your photos!
For sewing tools and supplies I use regularly, you can also have a look at my Amazon Storefront here: https://amzn.eu/d/04m09Bdc
Ready for your next project?
Have a look at these beginner friendly sewing posts next -


Comments