Mastering the Star Tile Quilt: A Guide to the Disappearing Hourglass Block
- Sep 25, 2025
- 2 min read
Updated: Oct 12, 2025
Introduction to the Star Tile Quilt Project
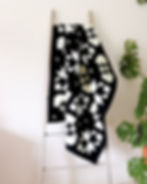
Disappearing Hourglass Quilt Blocks
If you’ve been following along with my Star Tile Quilt project, you’ll know that this design is all about playing with simple blocks to create something truly striking. The quilt pattern is available now as a free PDF download!
In this post, I’ll show you how to sew the classic Disappearing Hourglass quilt block in two different ways. With just a few clever cuts and rearrangements, you can transform a basic block into two stunning star variations. These blocks form the heart of the Star Tile Quilt, so once you’ve mastered them, you’ll be all set to dive into the full pattern when it’s released.

Tips for Working with Bias Cuts
Because these blocks are cut and sewn on the bias, the fabric edges can stretch more easily than straight-grain pieces. To help keep things neat, handle your blocks gently and avoid pulling or tugging as you sew.
Pressing Techniques
Press your seams by lifting and setting the iron down, rather than dragging it across the fabric. This method helps maintain the integrity of your blocks. Additionally, consider using a little spray starch or pressing spray to add stability. Taking these small steps will make a big difference in keeping your blocks crisp and accurate!
Seam Allowance and Consistency
Throughout this tutorial, I’ve used a ¼" seam allowance, which is standard for patchwork. However, if you find you’re struggling to keep seams accurate, don’t worry. You can use a slightly smaller allowance instead. The most important thing is consistency, so pick what works best for you and stick with it.
Materials Needed for Each Block
For each block you'll need:
7" white square
7" black square


Finishing Touches: Sizing and Trimming
The finished sizes of these blocks should both be about 7.25". You might need to trim the sides to make them square. One of the best parts of the Star Tile Quilt is getting creative with colour! Play around with contrasting shades, subtle tones, or even unexpected pops of colour - there’s no right or wrong way to arrange your blocks.
Adding Sashing and Borders
Once you’re happy with your design, you can go ahead and add sashing, borders, or any finishing touches to complete the quilt on your own.
Happy sewing, Kym