How to make easy beeswax food wraps from cotton fabric
- Oct 30, 2021
- 3 min read
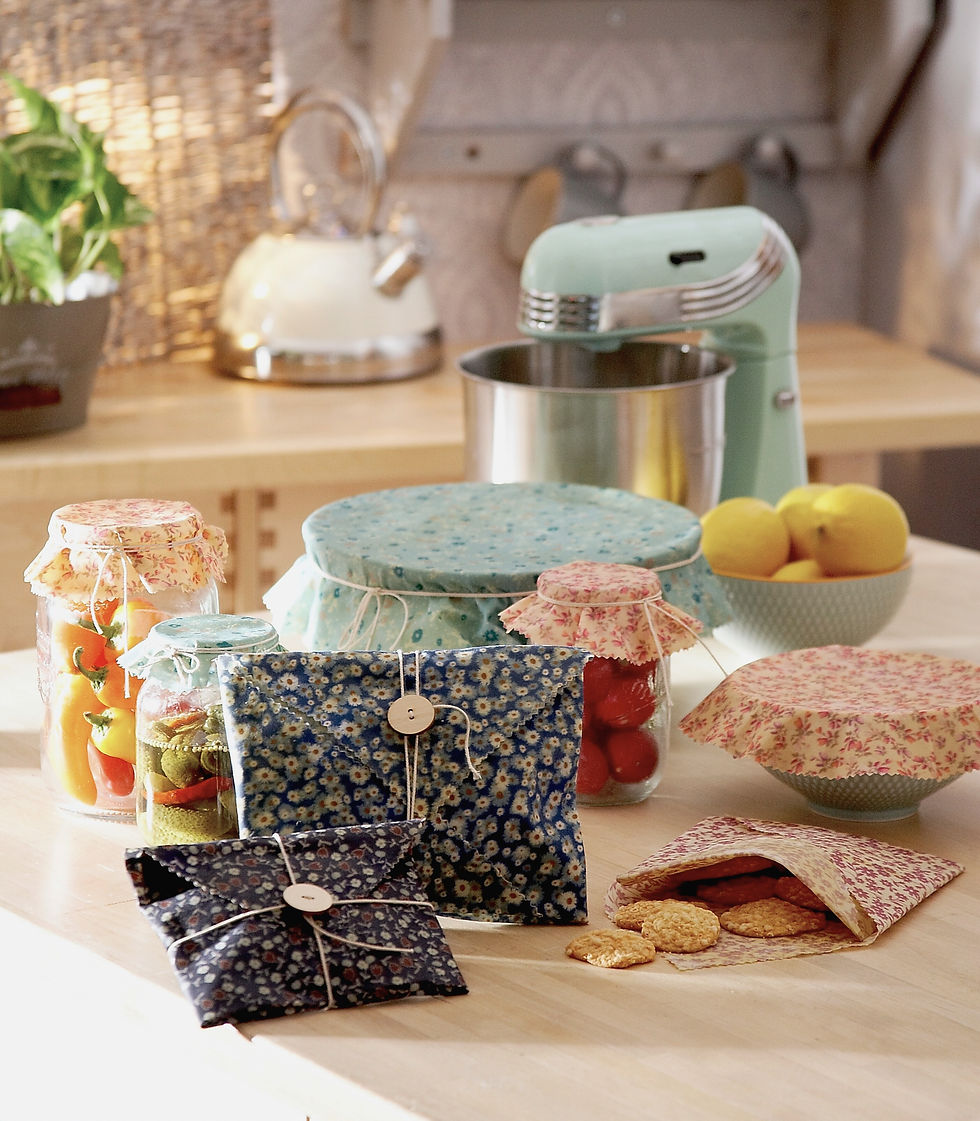
If you’re looking to reduce single use plastic waste in your kitchen, beeswax fabric is a great alternative! The reusable fabric can be used to wrap up foods or used as bowl covers to keep food fresh for longer. You can use these wraps on almost any foods except wet foods, high acidic foods and raw meat. Just make sure any hot foods have cooled before wrapping. To wrap your food, use the warmth of your hands to shape the fabric or fold the fabric before wrapping. Secure any bowls or wraps with string or ribbon if you wish. An easy, eco-friendly substitute that are great as handmade gifts or for yourself!
To clean your wraps, use cold or slightly warm water with a mild detergent (if necessary) and wipe clean with a sponge or cloth - if the water is too hot it will melt the wax. Rinse with cold water and hang to dry.
What you’ll need:
- Beeswax pellets or blocks (if you use blocks, you’ll need to grate them)
- Fabric 100% cotton fat quarters (the beeswax will give your fabric a yellowy hue so keep that in mind when choosing your fabric)
- Jojoba Oil (this will help the wraps stick to themselves when wrapping)
- Grater (if you’re using beeswax blocks)
- Greaseproof or parchment paper
- Iron
- Pinking shears
- String to tie (optional)
- Buttons for decoration (optional)
TIP- Pre-wash your fabric so that the colour doesn’t run.
Fabric featured- Pack of 5 Ditsy Florals Fat Quarters from Dunelm
1. Cut down your fabric to the size you’d like. I’ve made lots of different sizes of squares for different uses.
Use pinking shears to cut so that the fabric doesn’t fray. (You can cut the fabric after it has been coated in beeswax too. I decided to cut some of mine in circles later on)

2. If you’re using blocks of beeswax, grate them into a bowl.

3. Cut two pieces of greaseproof paper bigger than the piece of fabric you want to coat in beeswax. Place your fabric on one piece of paper and sprinkle the beeswax on top. Start with a small amount of beeswax, you can add more as you go if it is needed. Add a few drops of oil over the fabric. The oil will spread as you start to iron.

4. Place the second piece of greaseproof paper on top.
Use an iron to melt the wax and push it across the fabric.
As you’re ironing and he wax begins to melt, you’ll see any spots that might need more wax. Keep adding wax until it has melted and the fabric is fully coated.
Turn the fabric over and repeat if necessary to make sure the back is also covered.
TIP – don’t get any wax on your iron if possible! If you do then wipe clean with a cloth. This can get quite messy so do make sure your greaseproof paper is bigger than the fabric. Don’t hold the iron on the fabric in one spot for too long as it might start to burn.

5. Remove the fabric from the paper and hang to dry.
Repeat with all of the fabrics you have cut and these are now your beeswax wraps!
Tips for wrapping –
Here’s an easy way to make a pouch from the beeswax fabric for foods:
Fold your wax fabric in half diagonally so you have a triangle shape.

Fold in one corner of the triangle.

Fold in the other corner in and tuck in between the first.

Open the centre of the fabric to create the pouch.

Use string to keep the wraps secure if needed. You could also decorate with a button if you wish!
Store your beeswax warps on a cool, dry place when they aren’t in use.

Fabric gifted for a tutorial from The Bee Fabric Co and Dunelm


Comments